
Believe it or not, but I actually only got a B in my high school English exams, and up until the last number of years I was pretty bad at English. Writing & reading blog posts, and learning about content marketing is actually improved my English skills so much, as you’ll probably see in this post.
This blog post is 4,106 words long and took me 3.5 hours to CREATE – By create, I mean the ENTIRE process.. From coming up with the title, to doing keyword research, to writing, formatting and putting all the rest of the parts of a good blog post together. This should show you how quickly I can create high quality pieces of content.
So in my last post I talked a bit about a book that helped my content production skills, with insights, formatting ideas and general copywriting “laws/rules” – I didn’t give it much in the way of specifics, and there’s a lot more to creating “great content” (puke) in a timely fashion than just what’s inside that book.
Considering I’ve been asked this question a hundred times, and probably more.. I thought the mixture of last weeks post on books, and the consistent bombardment of messages/how the f*cks, it was time to get round to answering the question so many of you have asked me:
How Do You Produce Content So Much & So Quickly?!
Before I get into the ins and outs of the actual creation process itself. I thought I’d explain 3 advantages I have that most other people in this industry do not.
1) I Used To Play Video Games Competitively
Now, this may sound a bit strange, but let me explain.
Back when I was 14 – 16, I owned a competitive StarCraft 2 team, which I eventually sold to a much larger North American association, and became a player on their roster.
For those that don’t know, StarCraft is a real time strategy game that is classed as the biggest sport in Korea and requires an insane amount of reaction time, “micro” (aka actions per minute you can get on a keyboard/mouse) and knowledge of the game.
Not only does the entire micro thing come into extreme handy when I’m writing multi-thousand word blog posts every week.. As I can generally write about 1k – 2k words/hour – That includes doing research, inserting any links, images, videos etc.. As well – I write straight from the WordPress editor, which I’ll come onto later.
It also massively helps with dedication and finding free information. Learning to master a game that has over 50 units you can create, over 30 buildings you can build and in excess of 400 separate hotkeys – That you HAVE to remember. This kind of dedication to a computer helps you in the long run when having to sit at your desk for 12 hours/day 30 days a month. It also makes it 100x easier to learn where to find free information from.. As almost all gaming guides, tutorials and info you need to learn to become pro, are totally free: Mostly contained in the 30 page patch notes released every week, various YouTube guides and personalities, tons of forum & reddit threads to dissect and blog/news posts to go through.
I’m not nearly as good as I was, and I’ve moved on to a different game now (League of Legends) but I still get the occasional game and sometimes get to release a bit of footage:
Note: If you’re a subscriber to my YouTube channel, you’ll be happy to know that the video above is the first video since I bought a Sony Vegas Pro license.. So watch out for some way higher quality vids to come.
2) My Age
Unlike most of the 35+ year old folk in this industry, I’ve grown up with fast internet, in a generation that relies on social media for communication and streaming/downloading information on a daily basis is normal.
Most of my friends at school had some basic understanding of how computers worked. That’s something people who’re in their middle ages probably never got to experience as a teenager, and I got it before my 5th birthday.
3) Time
Unlike most people, I have the ability to take time off if I want to, whenever I want to.
- I’ve organized my affiliate sites to ALL be run by JV partners or “site managers” – The first, is a split revenue share, the latter being people I’ve actively hired and recruited to sites for me.
- My agency is co-owned by myself and another fantastic SEO, who handles the day to day operations. I simply work on leads, promo and strategy rather than any actual work on the clients sites myself.
The only thing I actually run myself, almost completely (aside from the graphics and development work) is this project. My blog.
I decided towards the end of June, 2016 that I’d cut back on my other projects to devote my time to growing out this blog, as realistically it’s one of my best long term business models. I’m consistently growing traffic (organic, social, email etc) every month thanks to new content and aging, I’m growing an audience outside of just SEO which means I can have a much larger audience base than ever before and I’ve been able to monetize in such a way that is both rewarding to my other business goals (I’ve partnered with a number of people inside my course, for example) and extremely profitable in the long run.
This means I can dedicate around 20 – 30 hours per week (I was previously doing maybe 10) to the blog, and growing it into a serious player in the internet marketing space. Yes, there are fulltime internet marketing bloggers out there (Woodward is a great example) but I’m more 50/50 – I still like to get down and dirty, I just prefer to do tests rather than physical work anymore.
How To Write A Blog Post Quickly
My technique only really works if you’re blogging via WordPress or in a similar content editor CMS, but gladly the majority of you will be.
On average, my blog posts are around 3,300 words and have video/image/audio content throughout – They also normally include some sort of microdata markup such as a schema review. On average, a blog post of this size/detail takes me around 2 and a half hours to create.. Not bad considering (in a 12 month period) that post will on average get about 4,500 pageviews.
Step 1) Ideas & Research
There’s a lot of ways to get your creative juices flowing and come up with a way to create a really solid piece of content in a very short amount of time. Here’s some techniques I use, and some examples of how I used them to generate traffic to my blog.
Newsjacking
If you’re seriously stuck for ideas, then the best way I come up with content is looking at the news.. Generally, an industry news site will cover something in very little detail (Around 200 – 500 words, max) but the aforementioned topic will have a lot of relevance right NOW, because it’s such a new thing. When Moz let go of over 25% of their employees, I put out an open letter which sort of “hijacked” the relevancy of that piece of news, and..
Brandjacking
Hijacking someone else’s brand/terms/keywords is always a good idea. A further example of this, is when I did a case study on black hat world which now ranks (In G UK) #2 for the brand terms around it:
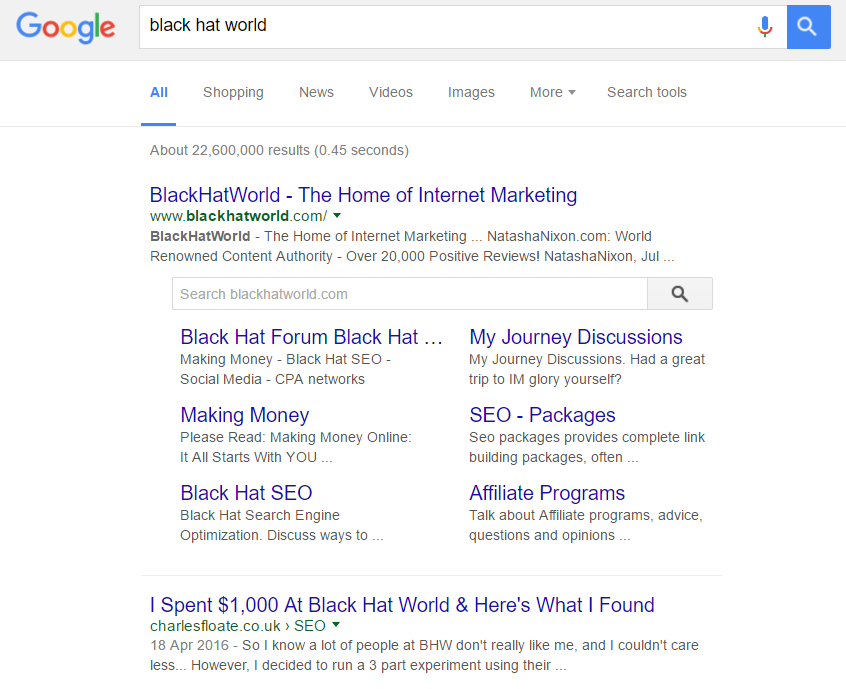
This post alone does about 700 organic visits a month thanks to some clever OnPage SEO.
Skyscraper Technique
Another way would be to use the “skyscraper” method, in which you reverse engineer your competitor’s top level content. An example of me doing this, is vs Backlinko:
- I ran Backlinko.com through Ahrefs to see his top referring keywords, in terms of organic traffic.
- I noticed his “YouTube SEO” page did close to 4,000 organic visits per month but hadn’t been updated in a considerable amount of time.
- I went ahead and created my own YouTube SEO Guide, which had a large (not quite as big as Brian’s) piece of content and a considerable amount of microdata/OnPage.
This page now does between 150 and 250 organic visits a month, with a one time 2 hour investment time.
Yes, I successfully skyscraper’d the creator of the skyscraper technique and stole a portion of his traffic because of it.
Reviews
If worst comes to worst, and you really cannot come up with an idea.. Then you can always fall back on the tried and tested affiliate method of reviewing something.
Not only will it likely make you some money in the long run, but it’s also a good way to practice your OnPage SEO skills.
Simply look for a product/service/tool in your niche, see if it has an affiliate program and bobs your uncle (I do actually quite dislike that phrase) you’ve got a starting point.
Step 1.5) SEO’ing
Now that you have an idea, it’s time to see if that idea is worth anything.
First, I look up the main keyword I want to go after, as an example, I’ll be using: how to write a blog – Which has 2,900 monthly searches in the UK.
I’ll then search that keyword into Google, and find the top 3 pages, in this case I get:
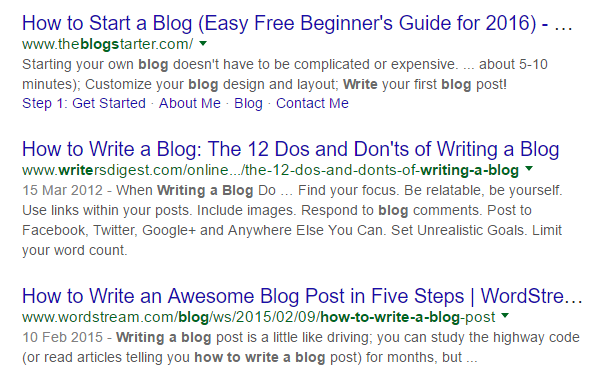
I’ll ignore #1 as it’s a root domain and too generic.. But #2 and #3 can then be run through either SEMRush or Ahrefs:
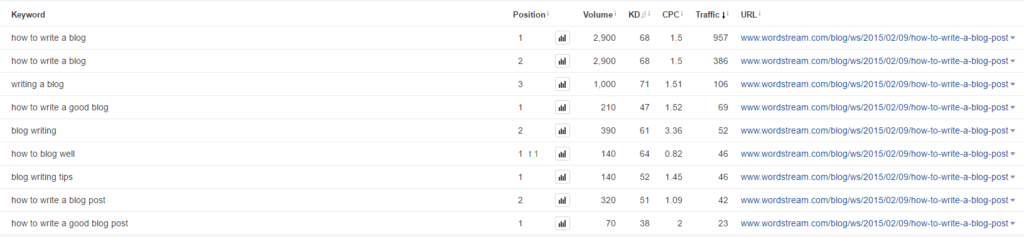
This gives me a list of keywords to start basing my meta title & description of, as well as start looking at using specifics of these keywords in the post. All from a post I KNOW ranks well.
I can also use these as an idea of the kind of length I need, though if you’re running a smaller blog than the ranking pages, you’ll likely need a considerably longer post. I can also dive into the backlinks of these pages, look for any link oppurtunities and start creating a link building strategy for the post – Though on this blog specifically, I don’t really build links to it.
Step 2) Initial Formatting
I always start off a blog post the exact same way:
- I write an “editable” title, that allows me to start formulating my ideas.
- I write the introduction.
Once I’ve got both of those parts done, I then generally have an idea of how I want to proceed with the blog post, so I start creating “sections” of the post.. What I mean by this, is I start creating headers for sections of my post, like:
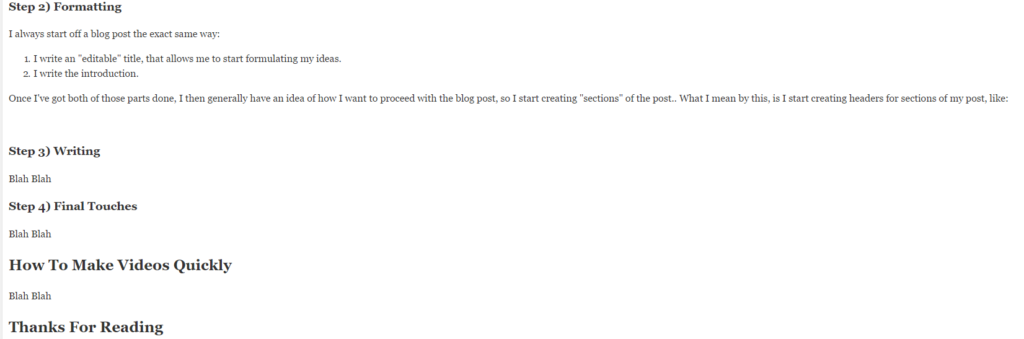
Of course you’ll be able to see the full post now, but this is what it currently looks like whilst I am writing it up to this point.
Step 3) Writing The Post
The kind of formatting I showed above, allows me to go down bit by bit and start filling out each section in an efficient manner – As I’m going through, I also normally start adding more and more sections until I feel the post is complete.
I’ll also look at competing posts to see what sections they have covered, just in case I haven’t thought of or have missed out a section I should of included. This also further helps to see the “style” people are using, if you haven’t previously wrote a post on that topic.. As some topics tend to be worded in different manners, so seeing the social share/comment count of various posts in comparison to their style/length etc.. Is a great way to understand how you should write a post.
Pro Tip: If you’re blogging around anything to do with computing, then get a tool called Gyazo – It’s what I use for all the above print screens, and you’ll be able to take a screenshot, download it and upload it to your blog post within literally 10 seconds.
Step 4) Final Touches
Once I’ve got a nearly finished product, I spend a little bit of time going through and looking for any spelling/grammatical errors.
I also add in the finishing touches that every blog post needs:
- Social Markup – Things like Facebook OpenGraph, A Twitter Card etc.. (I use WP Social SEO Pro on this blog, it’s super easy to configure all of your social markup for each site inside the post)
- A Featured Image – Every post should have a featured image, if not to make your blog look prettier when people are searching it.. Then at least for things like your Twitter card. I do NOT suggest using a stock image for a cover photo, get a custom designed one for every post, though I’ll cover this in the advice section later on.
- An Exerpt – It’s generally a lot better for SEO purposes if you write a custom excerpt than having your home & category pages show the start (or even full text) of a post. If you go to my homepage, you’ll see it shows a custom description for each blog post.
Depending on your niche, audience requirements and various other factors.. There may be other final touches you want to include in your post as well.
How To Make Videos Quickly
If I’m not putting our a blog post every week, I am certainly putting out a video on my YouTube channel. As long as a video doesn’t go into the >20 minutes length.. I can generally get an idea for a video, create it, render and upload all within an hour. Though I understand that some people may have a lot harder times when it comes to rendering/uploading – You need a decent comp spec, and a decent net speed for both to be time effective.
Before I get into how I actually make videos quickly. I thought I’d cover something I’m not actually covering in this section, which is: How to get ideas for your videos. Generally, it’s extremely easy to come up with ideas for videos.. Just answer questions people are searching for in short videos, and go for more generic keywords in the longer ones. Video also makes for a great tool for things like reviews and newsjacking.
Always Use YouTube!
I actually think Neil Patel’s idea to use Wistia on his QuickSprout university videos are plain stupid. He could be generating hundreds of thousands of visits a year from the huge amount of content he has in his “universities” video library if it were on YouTube instead.
I understand it when it comes to things like Rand’s Whiteboard Friday – He wants to be able to blog around the video, and have an interactive comment section.. but Neil doesn’t do this, and is simply losing out on a ton of traffic.
People often forget that YouTube is actually the second biggest search engine in the world, and people often use it to find easy to follow content. Use YouTube to send even more traffic to your site/blog, there’s no reason to use an alternative unless you’re a bigger company or wanting to keep your content more private.. Being seen is what you want as an internet marketer, exposure.
Step 1) Get A Setup
It doesn’t have to be insanely expensive, and if you’re going to be pumping out a video a week it shouldn’t cost more than a few hundred bucks.
My setup consists of:
- Camtasia Studio (For screen recording)
- Sony Vegas Pro (For actual editing)
- A 1080p HD Webcam – Cost me under £100 on Amazon, speficially the Logitech C930.
- A Blue Yeti Microphone (in black) with a decent clip-on pop filter.
- My office for my background.
In total, my setup cost me under $1,200 though the vast majority of that comes from the 2 pieces of editing software, which combined cost nearly $900.
Step 2) Get A Default Design & Intro/Outro
Something that’ll save you a bulk amount of time when it comes to producing your video content is having 2 default designs:
For Slide Shows/Presentations
This’ll allow you to quickly create presentations around specific topics, whilst keeping your branding on the video and having your social profiles at the bottom is always a good idea. This is perfect for when it comes to things like Newsjacking, as you’ll be able to create presentations in minutes rather than having to custom design a new slide show each time.
All you need is a 1080p background image for your main slides, and a standard image for your main title slide. You can also get a ending slide made up, though that’s what the outro is for.
For Your Thumbnail
Uploading a video without a thumbnail is proven to lower the click thru rates from the YouTube SERPs.
Get your designer to make a template, and send you a font.. You can then just edit it (and I’m not kidding) in PowerPoint with a couple PNG images and some text on top of it.
Intro / Outro
I highly recommend having an intro and outro made, it increases the professionalism of your videos and gives the end of your videos the ability to send traffic to your site and social profiles.
Here’s my intro and outro as an example:
If you don’t have a large budget, you can use Fiverr to create these. Though I had mine custom done, and it does look a lot more professional than the template based services on Fiverr.
Step 3) Begin With An Introduction
I (mostly) don’t script my videos at all.. but what you can do is do some test records: By that, I mean start off by recording the introduction of your video a few times to see what kind of style you want to present the video in.
Your introduction can literally just be “Hey guys, Charles here, and in today’s video I’ll be…” then let the intro play. This’ll give you a basis for what you want to then go about covering in the video and give your audience an insight into what they can expect from it.
The Easiest Video Editing Software: Camtasia
If you want something super simple, then Camtasia is the software for you. You’ll be able to literally just drag, drop and click about until your video is mashed into one.
It comes in a really easy interface, with some basic transitions and audio/visual effects but nothing overly fancy at all.
It’s also only got a $300 price tag, and that’s a one time fee for life.
If you’re just starting out, I highly suggest picking this up and spending an hour or 2 running through the training documentation before jumping straight into making a video.
Better Videos? Sony Vegas Pro
If you’re looking to get more studio quality production, then Sony Vegas Pro is the product for you. It does come with a double the cost price tag in comparison to Camtasia, but for good reason.
It’s got a much more complicated interface, with way more diverse opportunities and a track interface that makes working with Camtasia look like a piece of cake.
It’s icons alone can be daunting, and will require a significant time investment to learn how to use it to it’s best ability.
As an example, this is what my project looked like for my minitage I linked towards the start of this blog post:
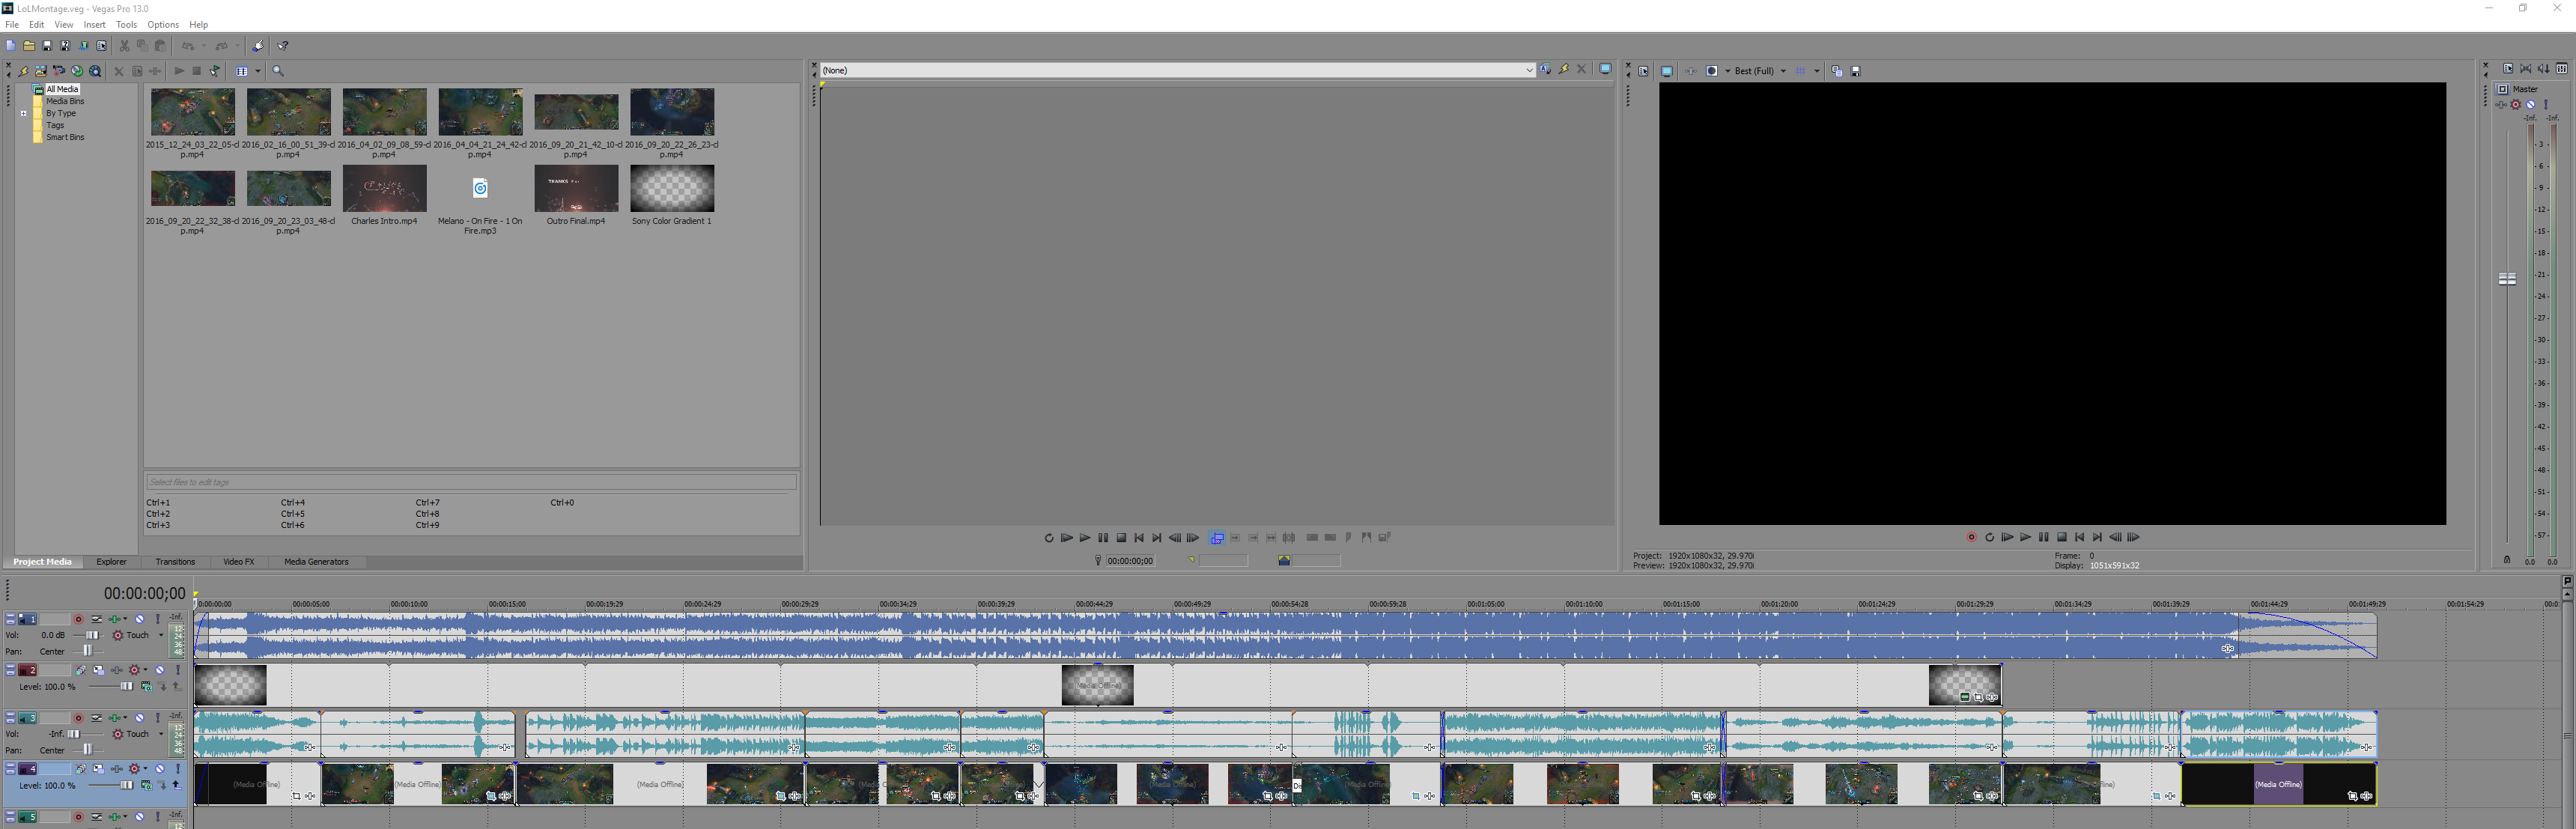
And that’s for a fairly basic project.
Rendering
When it comes to rendering a video, I always suggest rendering via a WMV file.
This is a “windows media video” file that renders in 1080p, normally in 60fps – If you’re in Vegas, render it at 8mbps.
If you want to get a higher resolution, or just a generally higher video quality then you will HAVE to go down the route of using .mov files (the Apple rendering format) but note that this will take a considerable amount of time longer than the WMV render.. On average, it’s about 3x longer for the same resolution and frame rate, just for a slightly higher quality.
Further Advice
There is a lot more than just the above things I wanted to cover, so here’s some additional advice I wish I’d listened to when I first started properly blogging back in early 2013.
Format Your Content With MicroData
One of the easiest ways to increase your organic rankings is via “formatted content” –
Very simple things like a table of contents and natural alt tags can massively increase your ranking potential, especially in SERPs where you’re going vs some of the bigger publications.
Note: If you want to step up your WordPress SEO game, get my eBook here.
Get A Graphics Guy
Get a freelancer that is good with graphic design.. There’s tons out there. You’ll notice the immediate increase in quality of the overall design of your blog, posts and YouTube videos when you have someone professionally creating graphics for you every time you release a new piece of content.
This is also a massive time saver, as it can take a good 10 – 30 minutes to create even one basic graphic, and means you don’t have to spend tens of hours learning PhotoShop.
You will be paying for quality though.. I pay my designer (a discounted rate, due to the amount of orders I put in) around £25/featured image, £60/slide show design and various other prices for the other types of graphics I order.
Use Social Queuing (I Use Buffer)
In the long run, this will save you a HELL of a lot of time.
Instead of manually going to your social profiles.. Use a service like Buffer (which is what I use) to schedule out your new pieces of content straight from your browser – Literally just navigate to the page, click the Buffer icon in Chrome and it’ll do a tab overlay which allows you to configure your share for Twitter, LinkedIn, Google+ and Facebook.
This also allows you to schedule out to the best times to share with your audience, and Buffer has a built-in tool that allows you to find the best times to post.
Please, Don’t Ramble
It can become very easy to start rambling on about things you don’t need to talk about.. but really want to. At the end of the day, all good writing is concise and to the point. People hate fluff and bullsh*t.
Keep your ramblings for your videos, where your audience will likely find them either funny or a further explanation/talk on an interesting point.
Don’t Procrastinate
I know, this probably sounds like the stupdiest advice in the entire world.. but it’s the way to get posts created in a timely fashion in the easiest way possible.
Leaving a blog post to go do something else can have a severe impact on it’s quality. You’ll always get the best results writing it from start to finish, because it’ll be a thousand times easier to remember what you’ve already produced.
Almost every post on my blog was created from start to finish, even my link building guide (over 9k words) was created in a 2 day period of madness.
If you’re a cereal procrastinator, then these tips might be of help:
- Close everything – Your tabs, your Skype.. Everything.
- Try using ZenPen – It’s a minimalist writing environment that should help keep you focused.
- Put your phone on airplane mode, so no one can bother you.
- Put on relaxing music. You don’t really want to be putting on extreme bass boosted songs, they overtake your brain and can halt creativity.. I find chilled house works best.
That’s All I Got (Or Wrote?)
Writing blog posts can be an extremely daunting process, but when done right it can be a path to a career of your choice, or even a life of your choice.
Blogging is hard to be “taught” in the right way.. And depending on your personality/type, will depend on who your writing will resonate with. Generally, at first try blogging in something you’re interested in, because it’ll be a lot easier to create your own style around something you actually enjoy, than something you’re forcing yourself to write.
And as always… Be yourself. If you want to swear, fucking swear. If you want to put in a meme you find absolutely hilarious, do it! Put your soul into it, and people will resonate a lot more with you.. And at the end of the day, you should be blogging to build something you want to do for fun: Don’t make it a chore.
Thanks For Reading
I hope you enjoyed this blog post and it gave you a bit more of an insight into how I go about creating my content, and in such a timely manner. Hopefully you’ve learnt a bit and can go out and produce your own content in the same amount of time.
I’d love to hear your content creation time saving hacks in the comments down below, and if you have any tools you recommend as well.
Don’t forget to join my 7 day free SEO course as well.
PEACE!